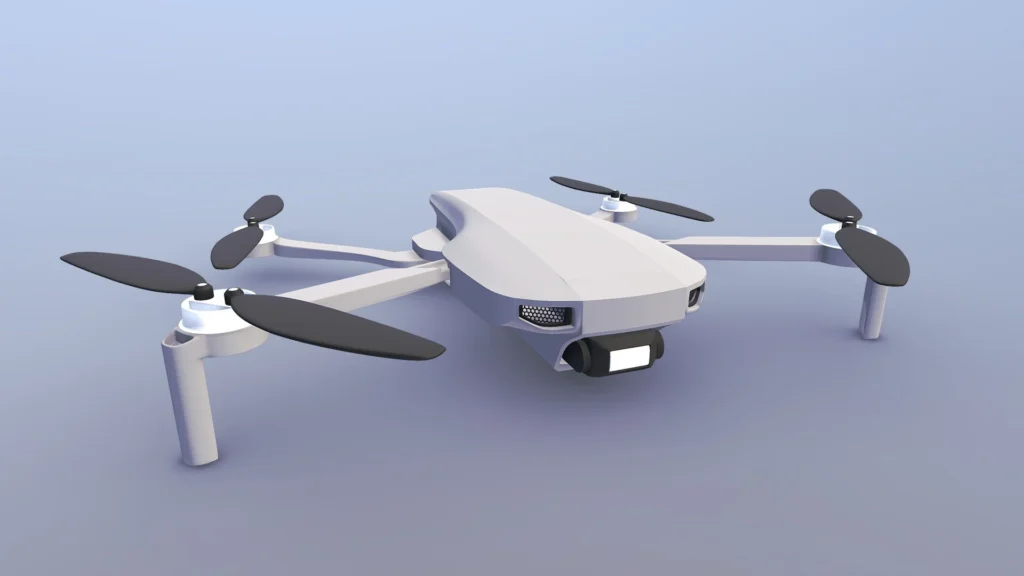
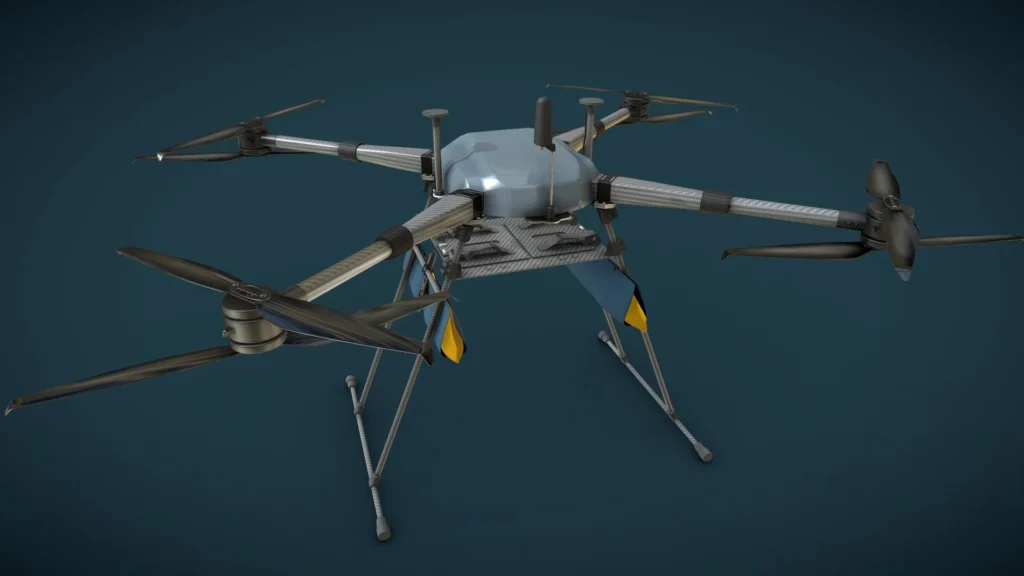
The Ultimate Engineering Guide to 3D Printing UAV Components – Part 1: Aerospace Material Science
The aerospace landscape has undergone a seismic shift with the advent of high-performance desktop additive manufacturing. What was once a specialized manufacturing process limited to military contractors is now accessible via the pea3d.com ecosystem. However, transitioning from printing decorative models to airworthy Unmanned Aerial Vehicle (UAV) components requires a sophisticated understanding of material science and structural physics. In the world of flight, every gram is a penalty, and every mechanical vibration is a potential point of failure. This 1000-word deep dive focuses on the foundational pillars of 3D printing for drones: selecting the correct “polymer DNA” and engineering internal geometries that defy traditional manufacturing limits. At Pea3D Home, we believe the modern “maker” is the new aerospace pioneer.
1. Material Science: Choosing the Right “Airframe DNA”
In UAV engineering, the material choice is the single most influential factor in flight performance. You are in a constant battle with the laws of physics, specifically the balance between stiffness (Young’s Modulus) and mass (density). Before you commit to a 24-hour print for a main frame or arm, it is a professional necessity to utilize a 3D printing cost calculator to evaluate the economic and material efficiency of your specific airframe design.
A. PLA+ and Tough PLA: Beyond Prototyping
Standard PLA is generally avoided in professional UAV builds due to its inherent brittleness. However, PLA+ (or Tough PLA) has been chemically modified with impact modifiers to offer better toughness. It is an excellent choice for non-structural parts such as GPS mounts, antenna protectors, or landing gear extensions. Its primary advantage is dimensional accuracy; what you design in CAD is exactly what you get on the bed. The downside? Its low glass transition temperature (around 60°C) means it can warp if left in a car on a sunny day or near high-current electronic speed controllers (ESCs). For developers looking for detailed thermal properties of these polymers, the NIST Additive Manufacturing Research provides excellent empirical benchmarks.
B. PETG: The Resilience Champion for Mid-Range Missions
PETG (Polyethylene Terephthalate Glycol) is the “safe” choice for many intermediate drone builders. It offers a unique balance of flexibility and strength. In the event of a high-speed crash, a PETG arm is more likely to bend and absorb the energy of the impact rather than snapping into shards. This energy absorption property is critical for protecting expensive components like brushless motors and lithium-polymer batteries. Furthermore, PETG’s natural UV resistance makes it ideal for long-range outdoor missions where the drone might be exposed to direct sunlight for hours without degrading the polymer chains.
C. High-Performance Carbon Fiber Reinforced Polymers (PA-CF / PET-CF)
For those aiming for professional-grade or racing performance, Carbon Fiber (CF) reinforced filaments are the industry standard. These materials consist of a base polymer (like Nylon 6/12 or PET) infused with micro-strands of chopped carbon fiber.
- Stiffness: This is the most critical factor for flight controllers. A stiff arm prevents the mechanical resonance that can cause “prop wash” oscillations.
- Weight-to-Strength Ratio: CF filaments allow you to print thinner walls while maintaining the same rigidity as thicker standard plastics, directly increasing the Thrust-to-Weight ratio.
- Thermal Stability: These materials won’t soften even under the intense heat generated by high-performance ESCs and high-KV motors.
2. Structural Foundations: Beyond the “Solid Part” Myth
A common beginner’s mistake is assuming that a 100% solid (infill) part is the strongest. In aerospace engineering, we focus on Structural Efficiency. A solid part is heavy, and heavy parts crash harder. The goal is to use geometry to create strength, much like the hollow bones of a bird.
Wall Loops vs. Infill Density: The “C-Beam” Strategy
The strength of a 3D printed drone arm comes primarily from its perimeters (walls), not its infill. By increasing the wall count from 2 to 6 or 8, you create a hollow structural member that acts like a carbon fiber tube or an I-beam. This distributes the stress along the continuous strands of plastic. In most UAV applications, a part with 5 walls and 25% infill is significantly stronger and lighter than a part with 2 walls and 80% infill. This optimization is a core philosophy we promote at Pea3D.
Gyroid Infill: The Multi-Directional Vibration Shield
Internal vibrations are the enemy of a drone’s flight controller. Traditional infill patterns like “Grid” or “Triangle” create straight lines that can harmonize with motor vibrations, confusing the gyro sensors. Gyroid infill is a 3D non-linear wave pattern.
- Isotropic Strength: It provides equal strength in the X, Y, and Z axes, ensuring the frame doesn’t twist under motor torque.
- Acoustic Dampening: The curved geometry naturally breaks up sound waves and mechanical hum, leading to cleaner PID loops and smoother flight.
- Open Cell Design: It allows trapped air to escape easily, which is vital during the “Annealing” process to prevent internal pressure from warping the part.
3. Anisotropy: Engineering for Layer Adhesion Physics
3D prints are anisotropic, meaning they are stronger in the direction of the extrusion than across the layers. They are weakest at the “bond” between layers. Designing for flight requires strategic print orientation:
- Horizontal Strength: If you print a drone arm lying flat on the bed, the plastic strands run the length of the arm. To break it, you have to snap the actual plastic fibers.
- Vertical Weakness: If you print that same arm standing vertically, the motor’s force will be pulling the layers apart. The part will fail at the first sign of high-G maneuvers.
Expert Tip: When designing motor mounts, incorporate “fillets” (rounded corners) instead of “chamfers.” Fillets distribute the mechanical load over a larger surface area of layer bonds, reducing the chance of stress fractures during hard landings.
4. Advanced Weight Distribution and CG Optimization
Aerospace-grade 3D printing allows you to do something impossible with traditional CNC carbon fiber sheets: create Variable Internal Densities. Professional drone developers use this to shift the weight of the airframe toward the Center of Gravity (CoG). By using 10% infill near the extremities (motor mounts) and 40% infill near the center (battery bay), you lower the moment of inertia. This makes the aircraft much more agile, allowing the flight controller to rotate the frame with significantly less energy expenditure.
| UAV Component | Recommended Material | Structural Strategy |
|---|---|---|
| Main Arms / Frame | PA-CF (Carbon Fiber Nylon) | High Wall Count (6+), Gyroid Infill |
| Antenna & VTX Mounts | TPU (95A) | Solid Infill for Vibration Absorption |
| Aerodynamic Shells | ASA or PETG | Thin Walls (2), Vapor Smoothed |
By mastering these foundations of Part 1—material science and structural geometry—you establish the technical base for an aircraft that is light, stiff, and resilient. In Part 2, we will move from “what to print” to “how to print,” covering advanced slicing mastery, thermal stress management, and aerodynamic post-processing.
The Ultimate Engineering Guide to 3D Printing UAV Components – Part 2: Slicing Mastery and Aerodynamics
In Part 1, we established the foundational principles of aerospace material science and structural geometry. However, even the most advanced Carbon Fiber Nylon filament can fail if the “digital instructions”—the G-code—are not optimized for the unique stresses of flight. Part 2 of our definitive guide at Pea3D Home focuses on the bridge between CAD design and physical reality: Advanced Slicing Architecture, Thermal Stress Management, and Aerodynamic Surface Optimization.
UAV components operate in a high-vibration, high-torque, and varying-pressure environment. A standard “all-purpose” slicer profile is insufficient for these needs. We must manipulate the slicer to act as a micro-structural engineer, placing plastic only where the physics of flight demands it. Before diving into these complex settings, ensuring the cost-effectiveness of your production via our 3D printing cost calculator is essential to maintain a sustainable development cycle for your drone projects.
1. Advanced Slicing Architecture: Beyond Standard Profiles
The slicer is your primary tool for defining the internal “nervous system” of your drone. For high-performance UAVs, we move beyond basic infill and wall settings into the realm of Variable Settings and Fibre Path Optimization.
A. Variable Layer Height: Balancing Aerodynamics and Strength
Aerodynamic surfaces, such as motor cowlings or airfoil-shaped arms, require smooth curves to minimize drag. However, structural integrity requires consistent layer bonding. By using Variable Layer Height, you can use thin layers (e.g., 0.08mm) on the curved top surfaces to improve laminar flow, and thicker layers (e.g., 0.20mm) on the vertical structural walls to maximize print speed and layer adhesion strength. This ensures the component is “slippery” in the air but “rigid” in its core.
B. Modifier Volumes: Strategic Reinforcement
A professional UAV frame is rarely uniform in its stress distribution. The points where the motors mount and where the arms meet the main body (the “root”) experience the highest mechanical leverage. Instead of printing the entire part with heavy infill, use Modifier Volumes in slicers like Bambu Studio or PrusaSlicer to:
- Increase wall loops to 10 or 12 only at the motor mounting holes to prevent bolt crushing.
- Switch infill from 20% Gyroid to 100% Solid at the arm joints for maximum torque resistance.
- This technique creates a “composite-like” structure that is incredibly light but reinforced exactly where the physics of flight dictates.
2. Thermal Management: The Secret to Molecular Layer Bonding
When printing engineering-grade materials like PA-CF or ASA, the greatest enemy is Internal Stress. If a layer cools too quickly before the next layer is deposited, the molecular bond is weak, leading to “delamination” mid-flight. This is where high-end hardware with active chamber management becomes a necessity rather than a luxury.
Active Chamber Heating vs. Passive Enclosures
Passive enclosures merely trap the heat from the bed. For true aerospace components, Active Chamber Heating (maintaining a constant 60°C to 90°C) is mandatory. It keeps the plastic in a “semi-annealed” state during the print, allowing the polymer chains of the new layer to interweave with the previous layer at a molecular level. This results in parts that are up to 40% stronger in the Z-axis. For a deep dive into the thermodynamics of additive manufacturing, the ScienceDirect Engineering Archives on Thermal Stress provides invaluable data for technical developers.
3. Aerodynamic Optimization: Minimizing Drag through Post-Processing
A 3D printed surface is naturally stepped and porous, which creates Turbulent Flow. For high-speed FPV drones or long-endurance fixed-wing UAVs, this drag significantly reduces efficiency. Reducing drag is as important as reducing weight in the total flight equation.
A. The “Ironing” Feature for Laminar Flow
Enabling the “Ironing” feature on the top surfaces of your motor mounts and top plates creates a near-injection-molded finish. By smoothing the top layer with a hot nozzle, you eliminate micro-turbulences that occur as air passes over the drone at 100+ km/h. This slight adjustment can increase top speed and battery life by several percentage points due to reduced parasitic drag.
B. Vapor Smoothing for ASA Shells
If you are using ASA (Acrylonitrile Styrene Acrylate) for your external aerodynamic shells or GPS covers, Acetone Vapor Smoothing is a transformative technique. It chemically melts the outer “steps” of the layers, creating a perfectly smooth, glass-like surface. This doesn’t just look professional—it optimizes the aerodynamic profile and seals the part from moisture, which is vital for drones operating in humid or rainy environments.
4. The Secret Weapon: Post-Print Annealing
Even the best print has internal stresses from the rapid heating and cooling cycle. Annealing involves placing the printed part in a controlled thermal environment (often packed in fine sand to prevent sagging) at a temperature just below its glass transition point for several hours.
- PA-CF Annealing: For Carbon Fiber Nylon, this process recrystallizes the polymer, drastically increasing its heat resistance and stiffness.
- Dimensional Compensation: Professional developers always calculate for 1-2% shrinkage before printing the final, airworthy components.
Aerospace Integration Note: When mounting electronics, use 3D printed TPU (95A) vibration dampeners between the frame and the Flight Controller. This “soft-mounting” technique, combined with the structural rigidity of PA-CF, ensures the cleanest possible data for your PID loops.
Mastering the slicer is the final step in the digital manufacturing chain. By combining the material science of Part 1 with the architectural precision of Part 2, you are no longer just “3D printing”—you are aerospace manufacturing. The ability to iterate on these complex settings is what makes the modern developer a true pioneer in the UAV industry.