

Creality HI Combo Maintenance and Mechanical System Optimization
Creality HI Combo maintenance is the cornerstone of preserving the 2026 flagship’s high-speed capabilities and AI-driven precision. The Creality HI Combo represents a leap in open-frame “bed-slinger” technology, integrating dual-Lidar sensors and load cell systems traditionally reserved for enclosed industrial machines. However, its open architecture exposes sensitive optical sensors and high-velocity mechanical parts to environmental contaminants like dust, humidity, and filament micro-debris. A professional Creality HI Combo maintenance routine ensures that the machine maintains its 600 mm/s speed without sacrificing the micron-level accuracy required for professional-grade prototypes.
1. AI Lidar 2.0 and Optical Sensor Conditioning
The “intelligence” of the HI Combo resides in its dual-Lidar 2.0 sensors, which perform real-time flow rate adjustments and first-layer inspections.
- The Fogging Phenomenon: During high-temperature printing, filament outgassing creates a microscopic film over the Lidar lenses and the AI camera. This “fog” scatters laser light, leading to failed calibrations or inaccurate “spaghetti” detection.
- Optical Maintenance: During your Creality HI Combo maintenance, clean these lenses exclusively with a specialized lens cleaning solution and a high-density microfiber cloth. Avoid isopropyl alcohol (IPA) on the Lidar lenses, as it may degrade the anti-reflective coating. After cleaning, trigger the “AI Sensor Re-Calibration” from the Klipper-based interface to reset the sensor’s baseline visibility.
2. High-Acceleration Linear Rail Lubrication
The HI Combo utilizes hardened steel linear rails coated with an anti-friction layer to handle accelerations of up to 20,000 mm/s².
- Cleaning Protocol: Use a lint-free cloth dampened with IPA to strip away oxidized grease and accumulated debris. In an open-frame setup, check the rail grooves for microscopic filament strands or dust clusters that can cause “stuttering” at high speeds.
- Lubrication: For Creality HI Combo maintenance, use only high-speed synthetic lithium grease (such as Mobilux EP 1 or Creality’s proprietary HI-Series grease). Apply a uniform bead along the rail and cycle the toolhead through its full range of motion. Wipe away any excess to prevent it from attracting airborne particles.
3. Smart-Heat Bed and Load Cell Integrity
The HI Combo lacks manual leveling knobs; it relies entirely on load cells located beneath the build plate to calculate Z-offset and mesh leveling.
- Build Plate Surface Care: The PEI coating features microscopic pores for adhesion. A weekly deep clean with warm water and degreasing dish soap is more effective than IPA for removing persistent skin oils and filament additives.
- Load Cell Verification: Ensure the bed spacers are tightened to the frame. Any lateral movement (wobble) will introduce noise into the load cell data, leading to inconsistent first layers—a critical check in any Creality HI Combo maintenance schedule.
4. Belt Tensioning and Resonance Analysis
The machine utilizes an active motor-noise cancellation algorithm, but its effectiveness depends on proper belt harmonics.
- Adjustment: Tension the belts to approximately 110-140 Hz (using a frequency analyzer app). Over-tightened belts lead to premature bearing failure, while loose belts cause “ghosting.”
- Recalibration: Post-adjustment, you must run a “Vibration Compensation” (Input Shaping) routine. This software-side Creality HI Combo maintenance ensures the AI model is synced with the current mechanical tension of the belts.
Creality HI Combo Maintenance: Multi-Filament Logic and Extruder Overhaul
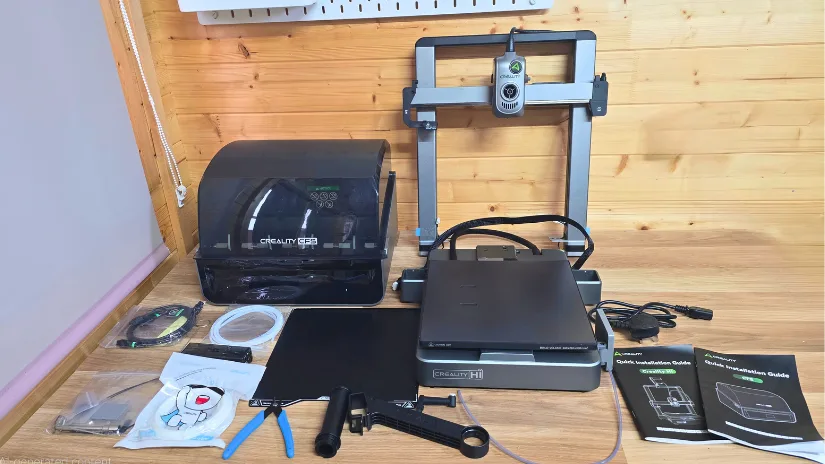
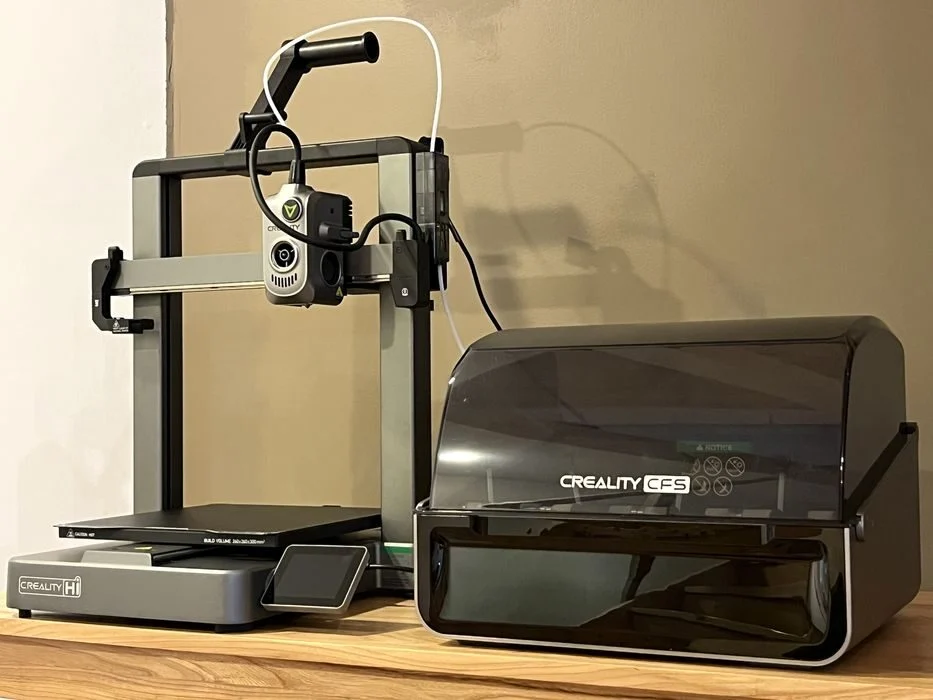
The Creality HI Combo maintenance process requires a deep understanding of the material path. The “Combo” unit is responsible for managing four different filament channels, executing rapid swaps, and ensuring the “Smart-Clog” sensors remain calibrated. Because this is an open-frame system, the mechanical junctions where the filament enters and exits the unit are prime locations for debris accumulation. Regular preventative care in these areas is the only way to avoid the dreaded “Filament Loading Failed” errors that can plague multi-color projects.
1. The Multi-Filament Combo Unit: Feeder Gear Servicing
The Combo unit uses high-torque dual-gear feeders to push filament through several meters of PTFE tubing. Friction is the enemy of this system.
- Debris Removal: Over hundreds of hours, the drive gears shave off microscopic amounts of filament, creating a fine plastic dust. This dust fills the teeth of the gears, leading to slippage and inconsistent flow.
- Maintenance Step: Open the feeder access panel and use a blast of dry compressed air followed by a soft-bristled brush to clear the gear teeth. Checking the tension of the feeder springs is also a vital part of Creality HI Combo maintenance to ensure the gears aren’t crushing the filament, which leads to deformation and jams.
2. Filament Cutter Replacement: The Secret to Reliable Swaps
The HI Combo executes a physical cut of the filament at every color change. A clean, 90-degree cut is mandatory; a jagged or crushed tip will eventually get stuck in the hotend entrance or the PTFE couplers.
- Blade Wear: Carbon-filled or abrasive filaments (like Glow-in-the-dark) will dull the industrial-grade blade significantly faster than standard PLA.
- Replacement Protocol: During your Creality HI Combo maintenance routine, inspect the filament tips in the purge bucket. If the ends appear flattened or “smeared” rather than sliced, the blade must be replaced. A fresh blade reduces the load on the toolhead’s cutting lever and prevents mechanical jams in the material path.
3. “Smart-Clog” Hotend and PTFE Path Maintenance
The HI series features a pressure-sensitive nozzle that detects clogs before they cause a total print failure. However, this electronic failsafe does not replace physical Creality HI Combo maintenance.
- The PTFE Coupler Check: The junction where the PTFE tube enters the toolhead is subject to constant vibration and movement. Over time, the tube can develop play within the coupler, creating a gap where molten filament can seep and harden.
- Optimization: Every 300 hours, trim 5mm off the end of the PTFE tube to ensure a fresh, tight seal. This is a low-cost, high-impact Creality HI Combo maintenance step that prevents 90% of mid-print extrusion failures.
- Nozzle Brushing: Clean the nozzle exterior with a brass brush while heated to 250°C. Residual plastic on the nozzle tip can interfere with the Lidar’s Z-offset calculation, leading to a botched first layer.
4. Cooling Fan and AI Processor Thermal Care
High-speed printing generates significant heat at the toolhead. The HI Combo relies on a high-static pressure 5015 fan and a dedicated heatsink for the AI processing unit on the carriage.
- Radial Fan Cleaning: Dust on the fan blades causes imbalance, which leads to vibration and “ringing” on the print surface. Use a precision brush to clear the intake.
- Heatsink Maintenance: Ensure the AI processor’s heatsink is free of dust. If the AI chip throttles due to heat, its ability to process real-time Lidar data and motor noise cancellation will be compromised, leading to degraded print quality.
5. Post-Maintenance AI Re-Sync (The Digital Handshake)
Once the mechanical components are serviced, the printer’s internal “digital twin” must be updated.
- Full Self-Test: Navigate to the system menu and initiate a “Comprehensive Self-Test.” This is the final and most important part of Creality HI Combo maintenance. The printer will test the new friction levels of the lubricated rails, the resistance of the new cutter blade, and the flow consistency of the cleaned nozzle to update its AI control model.
Creality HI Combo Maintenance – Expert FAQ and Troubleshooting
This final section addresses the most common technical hurdles faced by users of the HI series. By integrating these solutions into your Creality HI Combo maintenance routine, you can preemptively solve 95% of common machine failures.
1. How often should I perform Creality HI Combo maintenance?
For a machine operating in a standard home or office environment, a basic inspection of the Lidar sensors and rail cleaning should occur every 150 to 200 hours of print time. However, if you are utilizing abrasive materials (Carbon Fiber, Wood, or Glow-in-the-dark), the filament cutter and nozzle inspection should be performed every 3 spools. Consistent Creality HI Combo maintenance ensures the AI-driven error detection remains 99% accurate.
2. What is the safest way to clean the Lidar 2.0 lenses?
The Lidar 2.0 is the most sensitive component in the Creality HI Combo maintenance workflow. Never use paper towels or coarse cloths, as they can cause micro-scratches on the lens. Use only optical-grade microfiber cloths and a non-alcoholic lens cleaner. Isopropyl alcohol can strip the specialized anti-reflective coating on the Lidar lens, leading to “Laser Scattering” errors and failed first-layer inspections.
3. Why does my Combo unit experience frequent filament loading failures?
In the majority of cases, loading failures are caused by a dull filament cutter blade. When the blade is dull, it crushes the filament end instead of slicing it, creating a “mushroomed” tip that gets caught in the PTFE tubing. Replacing the blade is a core part of Creality HI Combo maintenance that restores seamless multi-color transitions.
4. Can I use WD-40 to lubricate the linear rails?
Strictly no. WD-40 is a degreaser and rust preventative, not a long-term lubricant. It evaporates quickly and leaves no protective film, which will lead to increased friction and potential galling of the steel rails. For effective Creality HI Combo maintenance, use only high-speed synthetic lithium grease. Proper lubrication is essential for maintaining the 20,000 mm/s² acceleration without motor desync.
5. My AI camera is not detecting print failures. How do I fix this?
If the AI “Spaghetti Detection” or “First Layer Inspection” is failing, first verify that the camera lens is free of “outgassing” film. After cleaning the lens, you must run the “AI Vision Tuning” calibration from the printer’s interface. This software-side Creality HI Combo maintenance allows the system to recalibrate its visual baseline under your specific ambient lighting conditions.