3D printing a model is only 50% of the journey. The raw plastic that comes off your build plate—often marred by layer lines, support scars, and a dull finish—needs professional intervention to become a true collector’s piece. The magic lies in post-processing. In this definitive guide, we will explore the professional secrets of 3D printer model painting and finishing to help you achieve gallery-level results.
Whether you are finishing a high-detail Mercedes AMG GT-R or a complex fantasy miniature, the following steps will guide you through the transition from “plastic toy” to “masterpiece.”
1. Why Post-Processing is Crucial for 3D Prints
The quality of a 3D model is not just defined by the printer’s resolution but by how the surface reflects light. Before diving into 3D printer model painting, you must understand that paint highlights imperfections. Without proper sanding and priming, your paint job will only make layer lines more visible. Museum-quality results require a foundation of smooth surfaces and sharp edges.
2. Essential Tools for Professional Finishing
To achieve a professional grade, you need the right toolkit. Here is a checklist of materials every maker should have:
- Sandpaper Set: Assorted grits from 200 to 3000 (suitable for wet sanding).
- Filler Primer: The secret weapon for hiding layer lines.
- Hobby Knife & Nippers: For precise support removal.
- Modeling Putty: To fill large gaps or print defects.
- Paints: High-quality acrylics, enamels, or automotive sprays.
- Varnish: Clear coats in gloss, matte, or satin finishes.
- Safety Gear: Dust mask and gloves (to avoid inhaling microplastics and paint fumes).
3. Step 1: Support Removal and Initial Cleanup
The process begins the moment the print is removed from the build plate. Removing supports (the temporary structures that hold overhanging parts) is a delicate art.
Techniques for Minimizing Scars
Use a pair of flush cutters to clip supports away from the model. Never pull them off forcefully, as this can tear “chunks” out of the surface. If the supports are stubborn, lightly heating them with a hairdryer can soften the plastic, making them easier to peel away without damaging the main body. Once removed, use a hobby knife to shave down any remaining “nubs” until they are flush with the surface.
4. Step 2: Mastering the Art of Sanding
Sanding is where the transformation truly happens. It is the most time-consuming part of 3D printer model painting, but it is also the most rewarding.
Dry Sanding (The Initial Phase)
Start with 200 or 400 grit sandpaper to remove the most prominent ridges. Always sand in a circular motion. This prevents deep, linear scratches that are harder to hide later. Focus on flat surfaces first, then move to curved areas.
Wet Sanding for a Mirror Finish
Once you reach 800 grit and above, switch to wet sanding. Dip your sandpaper in water frequently. The water acts as a lubricant, preventing the plastic from overheating and melting due to friction. It also keeps the sandpaper from clogging with plastic dust. Wet sanding up to 2000 or 3000 grit will result in a surface that feels like polished stone.
5. Step 3: The Secret Weapon—Filler Primer
If you want to excel at 3D printer model painting, you must use Filler Primer. Unlike standard primers, filler primer contains high-solids that settle into the microscopic valleys between layer lines.
Professional Priming Tips
- Thin Coats: Apply 3 thin coats rather than one thick coat. Thick coats can “clog” fine details like car logos or facial features.
- Distance: Maintain a distance of 20-25 cm from the model.
- The Contrast Check: Once the primer is dry (usually a matte grey), every remaining imperfection will become visible. This is your roadmap for final sanding. If you see a line, sand it down and re-prime.
6. Step 4: Gap Filling and Surface Repair
Sometimes, 3D prints have larger holes due to under-extrusion or seams where two parts were glued together. Primer alone won’t fix this.
Using Modeling Putty
Apply a small amount of plastic putty using a spatula. Let it cure completely, then sand it flush. This ensures that when you move to the 3D printer model painting phase, the surface is perfectly continuous.
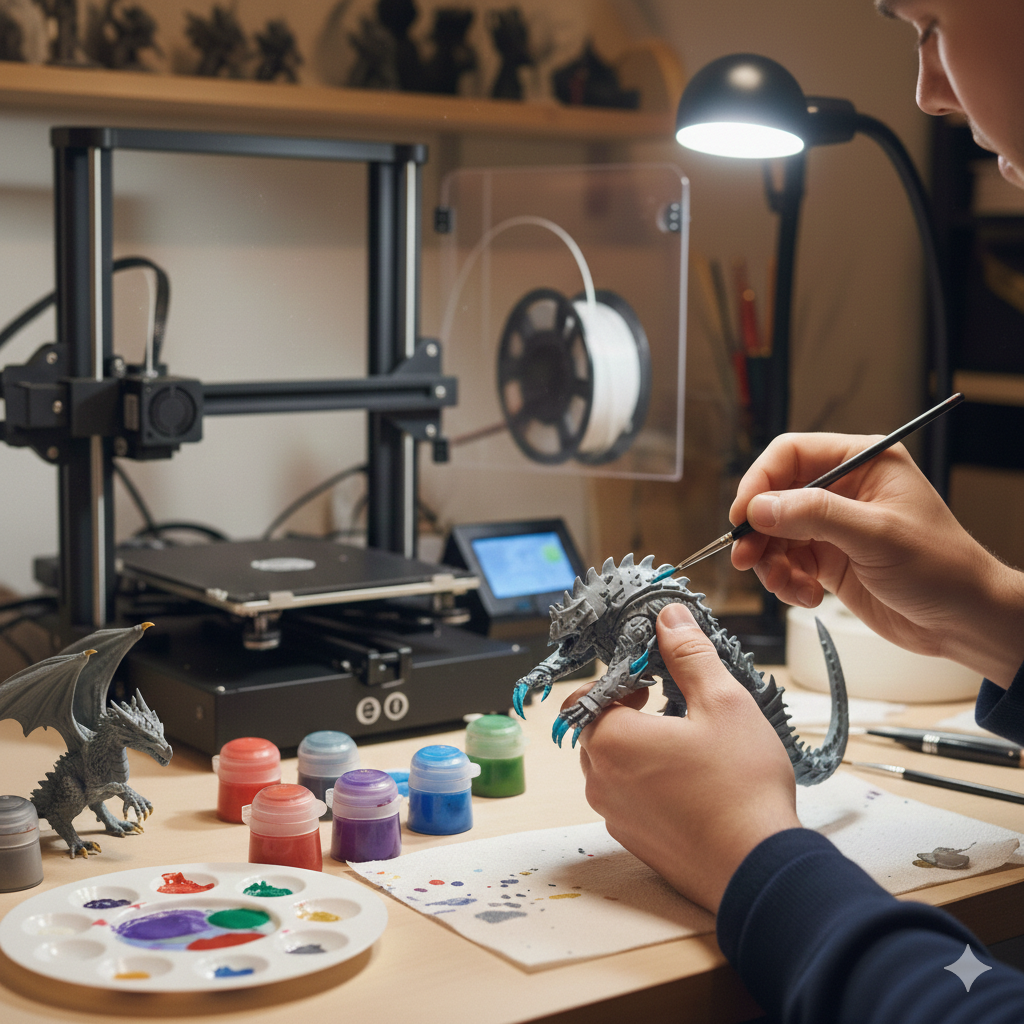
7. Step 5: Painting Techniques—Spray, Airbrush, or Brush?
Now that your model is smooth and primed, it’s time for color. The method you choose depends on the desired effect:
1. Spray Cans (Best for Automotive Models)
For large, smooth surfaces like a Mercedes body, automotive spray paints are superior. They provide a factory-level finish that is difficult to achieve with a brush.
2. Airbrushing (Best for Gradients and Miniatures)
An airbrush allows for extreme control. You can create soft shadows, highlight edges, and apply incredibly thin layers of paint that preserve every detail.
3. Hand Brushing (Best for Fine Details)
Use high-quality synthetic or sable brushes for tiny details like headlights, interior buttons, or character eyes. Thin your acrylic paints with water; several thin layers are always better than one thick, streaky layer.
8. Step 6: Adding Realism with Weathering and Washes
To make a model look like a real-world object rather than a plastic toy, you need to add “depth.”
The “Wash” Technique
A wash is a highly diluted dark paint (usually black or dark brown). When applied over the model, it flows into the recesses and panel lines. Once dry, it creates natural-looking shadows that make the details “pop.”
Dry Brushing
Wipe most of the paint off your brush until it is nearly dry. Lightly flick it across the sharp edges of your model. This simulates metallic wear and tear, giving the model a sense of weight and history.
9. Step 7: The Final Seal—Varnishing
The final step in 3D printer model painting is applying a clear coat. This protects your hard work from scratches, dust, and UV damage.
- Gloss Varnish: For cars, glass, and wet surfaces.
- Matte Varnish: For fabric, skin, and military vehicles.
- Satin Varnish: A middle ground, perfect for high-end plastics or leather.
FAQ: Frequently Asked Questions about Painting 3D Prints
Can I paint PLA without sanding? You can, but the layer lines will be extremely visible. At the very least, a coat of filler primer is recommended.
Why is my paint peeling off? This is usually due to poor surface preparation. Ensure the model is free of oils (from your fingers) and that you used a proper plastic primer.
How long should I wait between coats? Always follow the manufacturer’s instructions. Usually, 15-20 minutes for spray paint and 24 hours for a full cure before sanding.
Conclusion: Patience Leads to Perfection
Mastering 3D printer model painting is a journey of patience. From the first rough sand to the final clear coat, each step contributes to a professional result. By following this guide, you can turn any 3D print into a museum-quality showpiece that rivals professionally manufactured collectibles.