The 3D printer design process is the bridge between a digital concept and a physical, tangible object. While many beginners start by downloading pre-made models from repositories like Thingiverse or Printables, true creative freedom begins when you learn to create your own 3D printer design files. Designing your own parts is not just a hobby; it is a blend of engineering, material science, and artistic expression. In this comprehensive guide, we will explore the entire technical journey—from the initial sketch to the final G-code—covering the best software, technical constraints, and how to optimize production costs for pea3d.com readers.
1. The Core Philosophy of 3D Modeling for Additive Manufacturing
When you approach 3D printer design, you must understand that the digital world on your screen must comply with the laws of physics. 3D printers use Additive Manufacturing technology, meaning they build models layer by layer from the bottom up.
1.1. Geometric Integrity and Manifold Meshes
For a design to be recognized by a printer, it must be “Manifold” (watertight). If your model has holes in its surface or faces with zero thickness, the slicing software (Slicer) will fail to process it as a solid object. In 3D printer design, “watertightness” means the model has a fully enclosed volume. Mesh errors are common in polygon-based programs like Blender and must be repaired before printing.
1.2. Wall Thickness Optimization
One of the most common mistakes in 3D printer design is failing to provide adequate wall thickness. Generally, if you are using a standard 0.4 mm nozzle, your wall thickness should be at least 0.8 mm or 1.2 mm (multiples of the nozzle diameter). Walls that are too thin may warp, break, or fail to print entirely. If your part is intended to carry a mechanical load, increasing the number of walls (perimeters) provides much more structural integrity than simply increasing the infill percentage.
2. Best Software for 3D Printer Design
Your choice of software depends on what you intend to create. Here is a detailed breakdown of the top options used by professionals and hobbyists alike:
2.1. Tinkercad: The Perfect Entry Point
Tinkercad, by Autodesk, is a free, browser-based tool perfect for those new to 3D printer design.
- The Logic: It uses a “CSG” (Constructive Solid Geometry) method where you combine basic shapes (cubes, spheres, cylinders) or use them as “holes” to subtract from other shapes.
- Key Features: It includes a “Shape Generator” for parametric gears and springs, making it surprisingly powerful for simple mechanical parts.
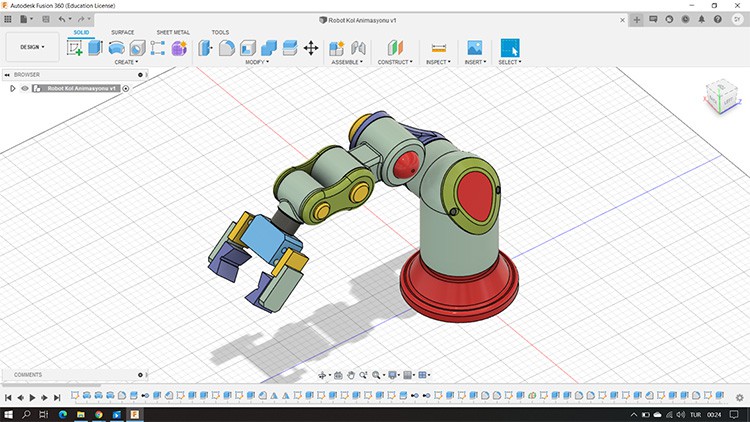
2.2. Autodesk Fusion 360: The Engineering Standard
For those who need millimetric precision and interlocking mechanisms, Fusion 360 is the industry leader.
- Parametric Modeling: This allows you to go back in your “Timeline” and change a dimension (e.g., a hole diameter), and the entire model will automatically update.
- Constraint-Based Sketching: You start with a 2D sketch, apply constraints (like making lines parallel or perpendicular), and then “Extrude” the sketch into the 3rd dimension.
2.3. Blender: Organic Forms and Artistic Sculpting
For figurines, characters, or complex decorative vases, Blender is the ultimate tool for 3D printer design.
- Sculpting Mode: It allows you to interact with your model like digital clay, using brushes to pull, push, and smooth surfaces.
- 3D Print Toolbox: This essential add-on analyzes your model for non-manifold edges, thin walls, and “overhangs” that might cause print failures.
3. Professional Design Techniques and Optimization
A design might look great in CAD, but that doesn’t mean it will print well. Here are the technical rules to master:
3.1. The 45-Degree Rule and Support Strategy
3D printers cannot print on thin air. Any part of the model that hangs out at an angle greater than 45 degrees usually requires “supports.”
- The Y-H-T Rule: Shapes like the letter “Y” are self-supporting. “H” shapes can “bridge” across gaps. However, “T” shapes require supports because the arms start in mid-air.
- Designing with Chamfers: By adding 45-degree chamfers to your overhanging edges, you can eliminate the need for supports entirely. This saves filament and reduces post-processing time.
3.2. Tolerance and Clearance in Mechanical Assemblies
If you are designing two parts that fit together (like a lid and a box), you cannot give them the exact same dimensions. Plastic tends to expand slightly when extruded.
- Standard Clearance: A gap of 0.2 mm to 0.3 mm is ideal for most hobbyist printers.
- Tight Fit: Use 0.1 mm for parts that should snap together and stay.
- Loose Fit: For moving mechanical joints, a clearance of 0.5 mm may be necessary.
3.3. Fillets and Bed Adhesion (Warping)
Large, flat models tend to pull away from the print bed as the plastic cools and shrinks—a phenomenon known as “warping.”
- Adding Fillets: Rounding the corners of your base reduces stress concentrations and helps the part stay flat on the bed.
- Mouse Ears: In your 3D printer design, you can add small, thin discs at the corners of a model to increase the surface area touching the bed, which can be easily snapped off after the print.
4. Material Science: How Filament Choice Affects Design
Choosing the right material is a core part of the 3D printer design process. Different filaments have different shrinkage rates and strengths.
- PLA: The easiest to print and great for fine details. However, it softens at 60°C, so it’s not suitable for car interiors or high-heat environments.
- PETG: A perfect balance of strength and flexibility. It is great for “Snap-fit” designs because it can bend slightly without snapping.
- ABS/ASA: Highly durable but prone to warping. Designs for these materials should avoid large, sharp-cornered flat bases unless you have a heated chamber.
5. Cost Analysis in 3D Printer Design
At pea3d.com, our mission is to help you create as efficiently as possible. A successful design is one that is cost-effective.
5.1. Calculating Filament and Electricity Costs
Every 3D printer design has a hidden cost. To calculate the total investment, you must consider:
- Material Weight: The volume of your model plus the infill.
- Energy Consumption: The power used by the heated bed and nozzle over the duration of the print.
- Depreciation: The wear and tear on your machine’s components (nozzles, belts, etc.).
Instead of doing these complex calculations manually, you can use our [3D Print Cost Calculator] on our website. Simply enter your filament price and electricity rate to get an instant, accurate report.
5.2. Infill vs. Structural Strength
Printing a part at 100% infill is almost always a waste of money and time.
- Smart Infill: Patterns like “Gyroid” provide equal strength in all directions while using less material.
- Shells over Infill: If you need a stronger part, it is almost always better to increase the wall count (shells) than to increase the infill density. This strategy can reduce costs by up to 40% while maintaining the same structural integrity.
6. Frequently Asked Questions (FAQ)
Do I need to be good at math for 3D printer design? You don’t need advanced calculus, but a basic understanding of geometry (angles, radii, coordinate systems) will speed up your learning curve.
Is my computer powerful enough for 3D modeling? Tinkercad runs on anything. For Fusion 360 and Blender, we recommend at least 8GB of RAM and a dedicated graphics card for a smooth experience.
Why does my design look “broken” in the slicer? This is usually due to “Non-Manifold” errors. It means your model has an open surface or a zero-thickness wall. Use repair tools like Microsoft 3D Builder or the Blender 3D Print Toolbox to fix it.
7. Conclusion: The Future of Personal Manufacturing
When you start creating your own 3D printer design projects, you move from being a consumer to a creator. You can fix broken appliances, design custom mounts for your car, or create entirely original pieces of art.
Remember: the best design is not just the one that looks the best, but the one that is optimized for cost, durability, and functionality. To analyze the electricity and material costs of your designs, be sure to use the tools on pea3d.com and explore our other technical guides.