

The Digital Inventory Revolution: 3D Printed Replacement Parts for Discontinued Products
In 2026, the “Right to Repair” movement has reached its peak. Consumers are no longer willing to throw away a $500 appliance just because a $2 plastic clip is broken. This is where 3D printed replacement parts for discontinued products become a game-changer for homeowners, car enthusiasts, and DIYers.
1. Which Discontinued Parts Can You Actually 3D Print?
The most successful “hits” on your website will come from users looking for these specific categories:
- Home Appliances: Dishwasher wheel rollers, refrigerator door handle clips, vacuum cleaner hose adapters, and blender drive gears.
- Automotive (Classic & Discontinued Models): Air vent slats, window regulator clips, dashboard knobs, and center console latches.
- Vintage Tech & Furniture: Old typewriter keys, turntable headshells, and discontinued IKEA-style cam lock nuts.
2. Why 2026 Technology Makes It Possible
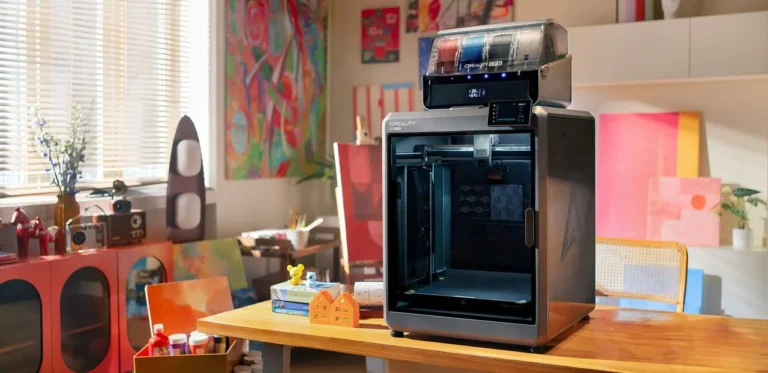
Earlier 3D printers were seen as toy makers, but today’s high-speed CoreXY machines provide industrial precision. When you create 3D printed replacement parts for discontinued products, you aren’t just duplicating; you are often upgrading the original design by using superior materials.
3. Finding the Digital Soul of the Part
If your part is broken, you have two options:
- Search the Global Databases: Check 2026’s massive STL repositories (like Printables or MakerWorld) using the model number of your device.
- On-Demand Engineering: Prepare to digitize the physical remains of your part, which we will cover in the next section.
Part 2: Material Science – Filaments That Outlast the Original Part

When creating 3D printed replacement parts for discontinued products, the choice of filament is the difference between a permanent fix and a temporary patch. In 2026, we have access to high-performance polymers that can actually outperform the factory-made injection-molded plastics.
1. Mechanical Gears and High-Friction Parts
Parts like blender gears or vacuum motor drives face constant heat and friction.
- Ideal Filament: Nylon (PA12) or Carbon Fiber Reinforced Nylon (PA-CF).
- Why? Nylon is self-lubricating and incredibly tough. Adding Carbon Fiber increases rigidity, making it as strong as some aluminum alloys.
2. High Heat and Chemical Exposure (Kitchen & Bath)
Dishwashers and coffee machines operate in environments with 80°C+ temperatures and harsh detergents.
- Ideal Filament: PETG.
- Why? PETG is chemically resistant and handles heat better than standard plastics. It’s also slightly flexible, preventing it from snapping under the pressure of a dishwasher rack.
3. Automotive Interior and Exterior (UV Resistance)
Car parts like vent slats or mirror covers are exposed to extreme summer heat and direct sunlight.
- Ideal Filament: ASA.
- Why? ASA is the 2026 successor to ABS. It is 100% UV resistant, meaning it won’t turn yellow or become brittle after months of sun exposure.
4. Gaskets, Seals, and Buttons
If you are replacing a discontinued rubber seal or a soft-touch button:
- Ideal Filament: TPU (95A or 85A hardness).
- Why? TPU mimics rubber. It’s nearly impossible to tear and provides excellent vibration dampening for appliance feet or remote control pads.
💡 Part 2 Tip: If you are printing a part for a kitchen appliance, ensure your filament is marked as “Food Safe.” Even if the material is safe, the tiny gaps between 3D printed layers can harbor bacteria, so consider coating functional food-contact parts with a food-safe epoxy.
Part 3: Reverse Engineering – Turning Physical Fragments into Digital Files

The biggest challenge in producing 3D printed replacement parts for discontinued products is often the lack of a digital blueprint. When a part snaps, you are left with physical fragments that must be translated into a 3D model. In 2026, the bridge between the physical and digital worlds is built using three professional reverse engineering methods.
1. Precision Measurement with Digital Calipers
For geometric parts like gears, spacers, or brackets, manual measurement remains the gold standard for accuracy. When measuring a broken component, it is vital to focus on the “functional surfaces”—the areas where the part interacts with other objects, such as hole diameters or gear tooth pitches.
A professional tip for this stage is to always incorporate a 0.15mm to 0.2mm clearance (tolerance) into your design for parts that must fit together. Since most filaments shrink slightly as they cool, designing with a “perfect” fit often results in a part that is too tight to assemble.
2. LiDAR and Photogrammetry for Organic Shapes
If you are dealing with a complex car dashboard piece or an ergonomic handle, traditional calipers will fail you. 2026 mobile technology allows us to use LiDAR sensors or AI-driven photogrammetry—taking 50+ photos from every angle—to generate a high-resolution 3D cloud.
When utilizing these scans, it is highly effective to use the scan as a “template” in your CAD software, drawing over the mesh to create a clean, parametric model rather than trying to print the raw, “noisy” scan data directly.
3. Strengthening the Weak Points
The beauty of re-designing a discontinued part is the ability to perform “Failure Analysis.” If the original manufacturer designed a clip that was too thin, causing it to fail, you can use software like Fusion 360 to beef up the stress points by increasing the thickness or adding a radius to sharp corners. This proactive design adjustment ensures your 3D printed version is actually an upgrade over the factory original.
Part 4: Slicer Mastery – Engineering Internal Strength for Functional Parts

The digital model is only half the battle. To ensure a part is fit for purpose, you must configure your slicer (Cura, PrusaSlicer, or OrcaSlicer) to prioritize structural integrity over aesthetic speed. In 2026, professional-grade slicing for mechanical parts relies on three core principles.
1. The Power of Wall Loops Over Infill
A common misconception is that increasing infill percentage is the best way to make a part stronger. However, structural tests in 2026 consistently prove that increasing the wall count (perimeters) provides much higher rigidity and impact resistance than a dense core.
For high-stress parts like door latches or gear assemblies, it is best practice to use at least 4 to 6 wall loops. This creates a thick “shell” that acts like a solid beam. A professional tip to remember here is that a part with 6 walls and 40% infill is almost always stronger—and uses less filament—than a part with 2 walls and 100% infill.
2. Choosing the Right Infill: The Gyroid Revolution
The internal pattern of your print acts as its skeleton. While “Grid” or “Triangles” are common, the Gyroid pattern is the 2026 industry favorite for functional parts. Unlike linear patterns, Gyroid provides equal strength in every direction (X, Y, and Z axes), making the part “isotropic.”
When printing mechanical components, using a 40% to 60% Gyroid infill ensures that the part can handle multidirectional stress without collapsing. Furthermore, since Gyroid lines do not cross each other on the same layer, it reduces nozzle vibration and minimizes the risk of internal delamination during high-speed printing.
3. Layer Adhesion and Part Orientation
The weakest point of any 3D print is the bond between its layers. To maximize this, you should print at the highest recommended temperature for your chosen filament. Higher heat allows the current layer to partially “melt” into the previous one, creating a monolithic structure.
Crucially, you must orient the part on the build plate so that the mechanical load is perpendicular to the layer lines. 3D prints are like wood; they split along the grain. If you are printing a hook, laying it on its side rather than printing it standing up will increase its weight-bearing capacity by up to 500% because the load will be carried by the continuous strands of filament rather than the layer bonds.
We have reached the final stage of our guide. In Part 5, we focus on transforming a raw print into a professional-grade component through post-processing, followed by a cost-benefit analysis and the essential SEO & FAQ toolkit to ensure your content ranks at the top of search results in 2026.
Part 5: Professional Finishing, Cost Analysis, and Success Strategies

The journey of creating 3D printed replacement parts for discontinued products doesn’t end when the nozzle stops moving. To reach industrial-grade reliability, a few final professional touches are required to ensure the part lasts longer than the machine it was designed for.
1. Professional Post-Processing for Longevity
Once the print is complete, you can significantly enhance its physical properties through two main methods:
- Annealing (Heat Treating): For high-performance filaments like ASA, PETG, and Nylon, placing the part in a controlled oven at a temperature just below its glass transition point for a few hours allows the internal stresses to relax. This process realigns the molecular structure, increasing the part’s heat resistance and overall impact strength.
- Chemical Smoothing: If you are working with ASA, an acetone vapor bath can melt the outer layer just enough to fuse the layer lines together. This creates a non-porous, airtight surface that is not only aesthetically identical to a factory-molded part but also much easier to clean in kitchen or medical environments.
2. 2026 Cost-Benefit Analysis: The Power of Repair
Understanding the value of your work is key to a successful repair mindset or business:
- Material Efficiency: A standard gear or handle uses roughly 20-40 grams of filament, costing between $0.50 and $2.00 depending on the material quality.
- Value Recovery: By spending less than $2 in materials, you are effectively “saving” an appliance or vehicle part that might have a replacement value of $200 to $2,000. In 2026, a professional tip for those looking to monetize this skill is to price your services based on the “Value of the Solution” rather than just the weight of the plastic used.